Showing posts with label orlocks. Show all posts

Sunday, 17 August 2014

Orlock Project Update: Leaders

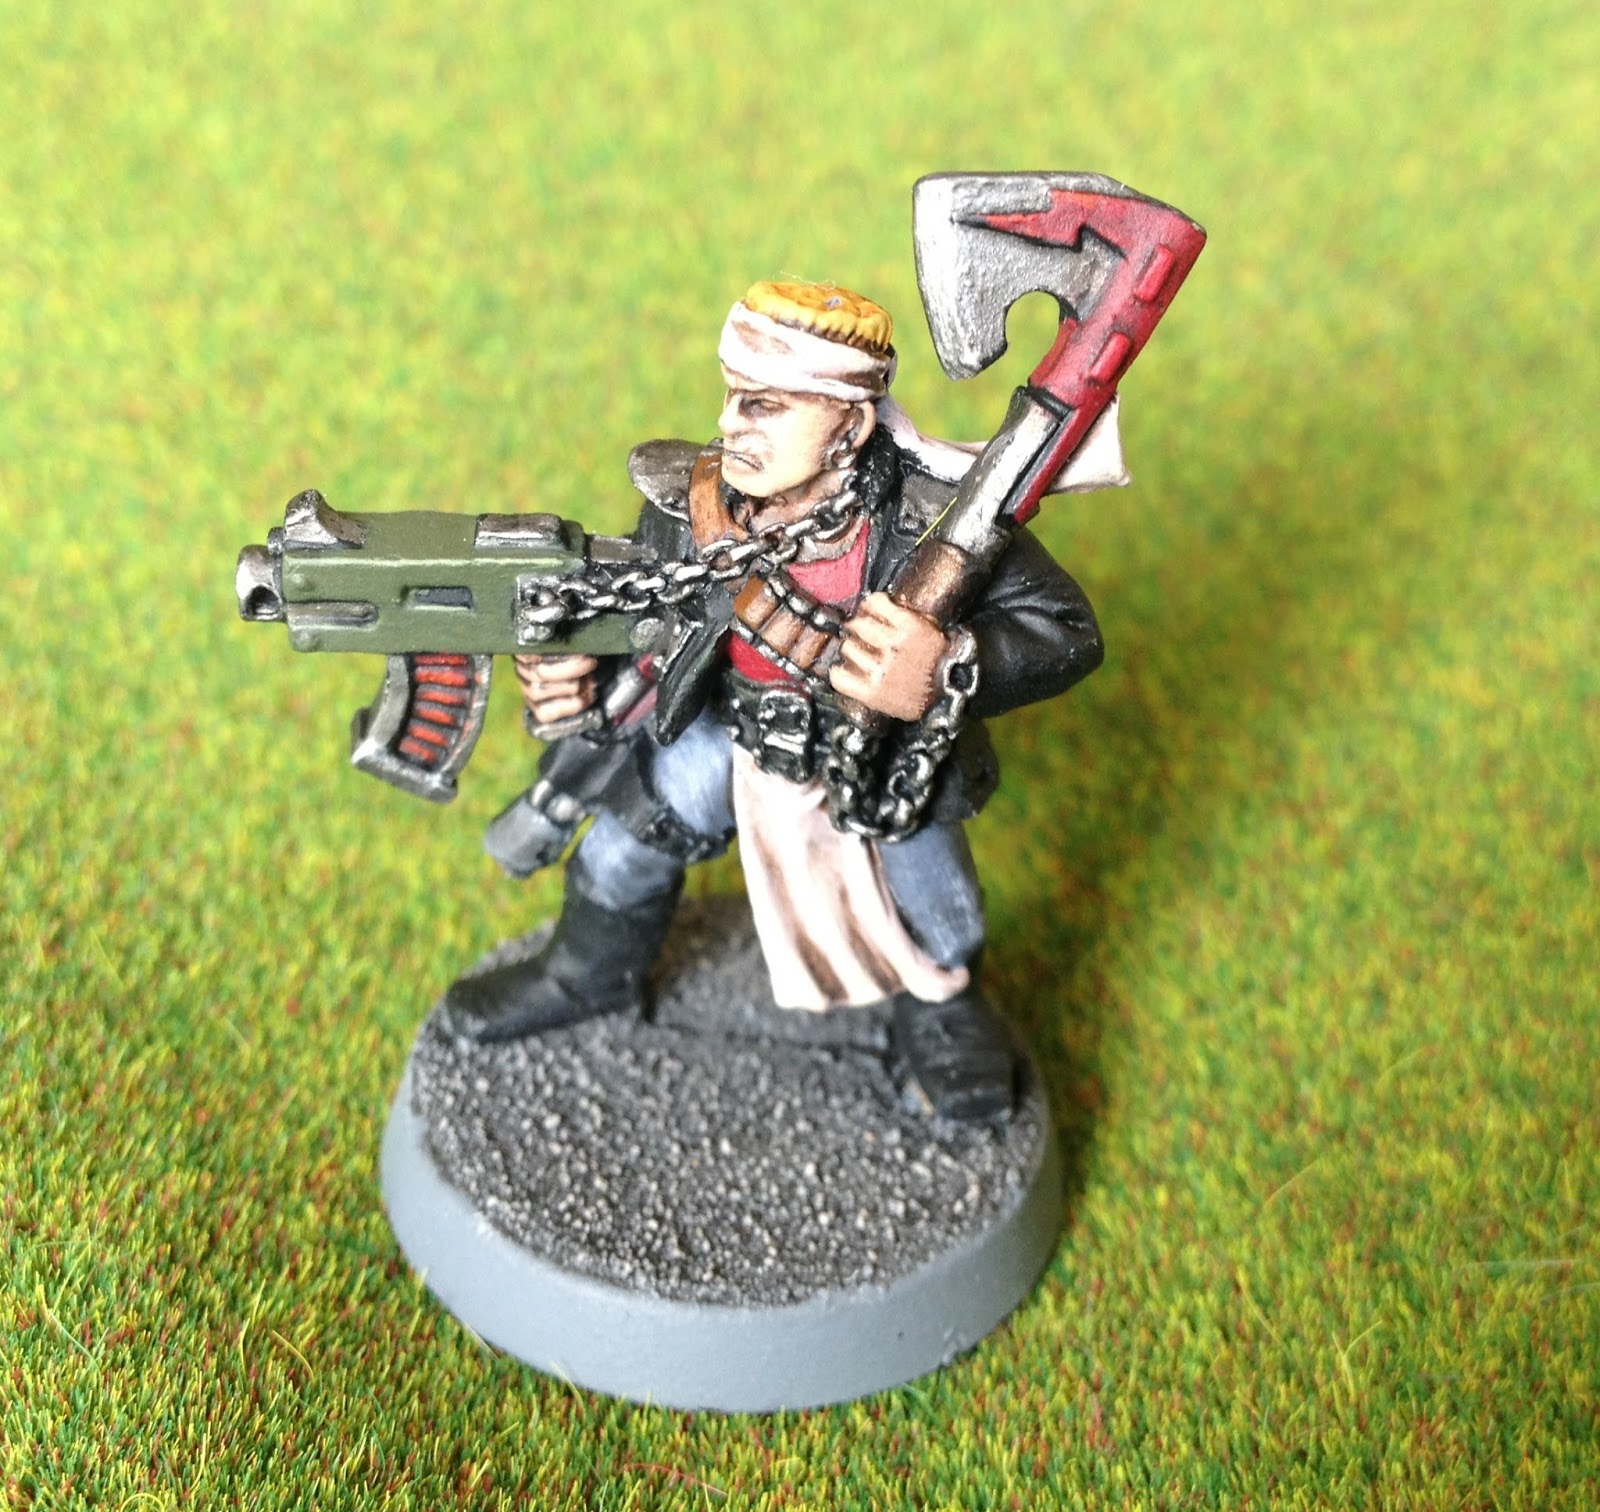
It has been a long time since I did any work on one of my ongoing projects, so I thought that it was time that things moved on with this one. I am gradually painting all the original 1995 sculpts, and this latest mini is the second of the two leaders from the set.
Here are the two leaders together:
My tutorial for painting orlocks in this style is here. I think that I've got about four more minis to paint in this set before I am finished. Now that I've got going again with this one I don't think that it will take me too long, and its high time that this one got put to bed.


Sunday, 2 March 2014

Orlock Project Update: Gangers


I am now getting to the final stages of my Orlocks project. I've been gradually collecting and painting all of the original 1995 scuplts, and now I have all the gangers complete.
These are the three that I've finished most recently.
I have also done a tutorial on the paint scheme that I use for these models, and there is also another one for doing the new style Orlocks that were released in 2001.

I've still got two juves, two heavies and a leader to paint, and I will do posts with all the minis in each category when they are finished.

Sunday, 8 December 2013

Orlock Project Update: Heavy Stubber #2

I am about half way through painting all of the original sculpt Orlocks from 1995. This is the latest model that I've finished. In fact, this one is a duplicate, rather than part of the collection of individual sculpts, but I have two heavy stubbers because that is a very solid choice when building a gang. He's painted using my 1995 Orlocks scheme.
The blue hair might seem like a strange choice but I think that these sculpts look a bit punk rock so you can get away with it. There's also a more practical reason - it makes it a lot easier to tell the different between your heavies when playing.
My two heavies are called Animal Mother and Animal Brother. This is nicked from Full Metal Jacket, one of my favourite films of all time. Animal Mother is the machine gunner in the squad that Joker joins up with during the Battle of Huế. This character immediately sprung to mind when I saw this mini painted, so I named my first heavy after him. Animal Brother is... well... his Brother!
The Real Animal Mother
This model has actually had a small conversion job done on it. The model is sculpted with a stubber in a holster on the back for his secondary weapon. Although in the rulebook it says that Heavies cannot have basic weapons, this was latter errata'd. This means that a lasgun is an excellent choice for a secondary weapon for a heavy, because it means that can still fire quite effectively when they are on the move. 

I've added a Lasgun on the left hand model, and the right one has the original stubgun.
Finally, here is a bonus picture of 40k Cat helping me to prepare this post. Recently, she seems to have been far less interested in joining in my photoshoots, but it is a bit cold today, so she decided to warm herself up using the fan on the laptop.


Sunday, 24 November 2013

Tutorial: Necromunda Orlock Scheme #2 - 2001 Style

I am about half way through painting the entire set of original sculpt Orlocks, and my paint scheme for these is here. A couple of the newer 2001 sculpts made it onto my painting table as well. Although I much prefer the earlier models, I thought that coming up with a paint scheme that would emulate the Games Workshop scheme for the new style Orlocks would be a worthwhile exercise, so here it is.

Here's the comparison with the official scheme. Not bad even if I do say so myself! I've made a couple of changes - I really don't like the sunglasses on the GW model and I have used a basing scheme that matches with the rest of my Orlock gang.
First, the base colours go on over a black undercoat. I use a mix of Vallejo, old and new GW paints. Where I've used anything else, I've listed the alternative in GW's current range.
  • Jacket and Boots: Vallejo Black / GW Abaddon Black
  • Denim: Vallejo Heavy Blue / GW Macragge Blue
  • Grenades: GW Waagh Flesh
  • Metal: Vallejo Gungrey / GW Leadbelcher
  • Weapon Casings: GW Castellan Green
  • Leather, Hair: GW Mournfang Brown
  • Flesh: GW Tallarn Flesh / GW Cadian Fleshtone
  • Bandana: GW Mechrite Red / GW Wazdakka Red
  • Base: Vallejo Neutral Grey / GW Mechanicus Standard Grey
A round of washes goes on next, starting to give the mini some depth. I also started the basing, using some PVA to stick sand onto the base.
  • Metal, Grenades: GW Badab Black / GW Nuln Oil
  • Flesh: GW Ogryn Flesh / GW Reikland Fleshshade
  • Leather, Hair, Bandana: GW Devlan Mud / GW Agrax Earthshade
This scheme follows a pretty standard approach - base, wash, the re-touch with base colour. Most of the mini gets its first set of highlights using the base colours, so I've not re-listed them all - they are same as in the first step. There are two exceptions - the leather and denim get a drybrush highlight with a different colour.
  • Denim: Drybrush GW Space Wolf Grey / GW Fenrisian Grey
  • Leather: Drybrush Vallejo Heay Warmgrey / GW Rakarth Flesh
Only a couple more steps are left. Another set of highlights goes on using lighter colours, either pre-mixed or by adding some white / bone to the base colour. The leather, denim and base get another wash.

  • Base and Leather: GW Badab Black / GW Nuln Oil
  • Denim: GW Asurmen Blue / GW Drakenhof Nightshade
  • Flesh: GW Kislev Flesh
  • Leather / Hair: GW Mournfang Brown mixed with bone
  • Metal: GW Runefang Steel
  • Weapon Casing and Grenades: GW Ogryn Camo
  • Bandana: Vallejo Crimson / GW Evil Sunz Scarlet
Finally, some finishing touches, including some gloss varnish on the metal lenses... The idea was to create a mirror shade effect but I am not that convinced. Worth a try though.
  • Base: Drybrush Vallejo Heavywarmgrey
  • Bandana: Glaze GW Bloodletter
  • Lenses: Varnish GW Hardcoat
This chap is ready for the underhive! I have glued him up with two pistols to represent a model in my gang who rolled the Gunslinger ability. Two autopistols at short range can be deadly.

Sunday, 27 October 2013

Tutorial: Necromunda Orlock Scheme #1 - 1995 Style

Here is the paint scheme which I use for the original sculpt Orlocks from 1995. I painted these for Poot, and he wanted them looking as close to the original box art as possible, but with a toned down basing scheme.

Here is another of my Orlock minis in comparison with the 1995 'Eavy Metal team's effort from the original Necromunda Sourcebook. Hopefully you'll agree that although it's not quite up to their standard, it's not a million miles off...


First, the base colours go on over a black undercoat. I use a mix of Vallejo, old range GW paints, and new range GW paints. Where I've used anything else, I've listed the alternative in GW's current range.
  • Denim - Vallejo Sombre Grey / GW The Fang
  • Weapons and other metal parts - GW Boltgun Metal / GW Leadbelcher
  • Cloth and headbands etc - Vallejo Heavy Warmgrey / GW Rakarth Flesh
  • Skin - GW Tallarn Flesh / GW Cadian Fleshtone
  • Boots - Vallejo Black / GW Abaddon Black
  • T-Shirt - GW Khorne Red 
  • Lasgun Casing - GW Castellan Green
  • Hair - GW Iyanden Darksun / GW Averland Sunset
  • Pick Handle - GW Rhinox Hide
  • Leather - GW Mournfang Brown
  • Base - Vallejo Neutral Grey / GW Mechanicus Standard Grey
I tend to vary the t-shirt and hair colours with different models in the gang, but I've used "default" colours for this example. Sometimes I give them green or purple hair because I think they look like they fancy themselves a bit as punk rockers...

Next a couple of washes are applied. At this stage, the model is looking a bit dark and messy, but this is just a step on the way to the final look and isn't anything to worry about. It would be looking a bit less dingy If I had chosen to use a flesh wash instead of a brown wash for the skin, but I wanted there to be a bigger differential between the recesses in the muscles etc. and the highlights. This could easily be substituted if you prefer the flesh wash.

  • Flesh, cloth, t-shirt - GW Devlan Mud / GW Agrax Earthshade
  • Denim and metal - GW Badab Black / GW Nuln Oil
  • Hair - GW Gryphonne Sepia / GW Seraphim Sepia
Now it is time for the first set of highlights, using the original base colours to brighten up the model up again, leaving the muddy wash colours only in the deepest recesses of the model. I won't re-list the paints because they are same as in step one above, but there is one exception. A drybrush with a lighter blue is used on the jeans to finish off the denim effect. Make sure the brush is really dry, the paint should be as chalky and dusty as possible to get this looking right.
  • Denim - Drybrush GW Space Wolf Grey / GW Fenrisian Grey
At this stage, I also started off the basing, using PVA to apply some sand.

The final stage on the mini itself is a second round of highlights, this time using some lighter colours. The sand on the base also gets a nice thick coat of grey.
  • Flesh - GW Kislev Flesh
  • T-Shirt - Vallejo Scarlet / GW Evil Sunz Scarlet
  • Cloth and Skull Pendant - GW Bleached Bone / GW Ushabti Bone, up to pure white in some places
  • Hair - GW Sunburst Yellow / Flash Gitz Yellow
  • Lasgun Casing - GW Ogryn Camo
  • Metal Parts - GW Runefang Steel
  • Pick Handle - GW Rhinox Hide 1:1 with bone
  • Leather - GW Mournfang Brown 1:1 with bone
To finish off the base, it gets a heavy black wash, followed by a drybrush with an off-white colour to bring out the texture of the sand. This minis is now ready to venture into the underhive!
I am really not sure how many people are looking for a tutorial about Orlocks, but here it is anyway... Next up is my scheme for painting the new style Orlocks that came out in 2001 as close to the official GW scheme of the time as possible. Don't all shout at once!

Sunday, 1 September 2013

Necromunda: 1995 Orlock Gang

A quick recap: our gaming group is currently enjoying a Necromunda revival using the original rules, scenery and models. I have just finished rescuing Poot's original Orlock gang that he got when he was 13. I didn't play Necromunda first time round, and I didn't know a great deal about it until recently, but I've got the bug now. I love how closely you track the development of each ganger, and some of the original sculpts are fast becoming some of my favourite vintage minis.

Here's the finished gang:

The reason I describe this is a "rescue" project is because this is what they looked like when I got my hands on them. They'd been spray undercoated and then left to rattle around in a box for twelve or thirteen years. 
They looked a mess, but all they needed was a quick brush and scrape to remove the loose undercoat, and a touch-up with Vallejo black airbrush primer applied with a brush and they were ready to paint. I will do a tutorial for the scheme I used in the next few weeks.


Ever since I saw this mini it is original rather battered state I really wanted to paint him. His heavy stubber had been converted into an autocannon by filling in the holes in the barrel with superglue. I drilled them back out again, and made a bit of a mistake on the back. Luckily, fluff comes to the rescue here, because it does look like it was knocked up in some illegal weapon shop in the underhive.  
Here are some individual pictures of the other gangers. I've also been working on some of the new sculpt Orlocks which came out with the updated rules and I'll get them up on here as well.


Sunday, 4 August 2013

Work in Progress: Necromunda Orlock Gang

I am back from a summer break from blogging, mainly because it has been far too hot in my nerd workshop so I've not been doing much painting. As it happens, our group is also taking a break from our regular 40k round robin league, and are going to run a Necromunda campaign over the next few weeks.

Tony dug out his original Orlock gang, which had been undercoated in about 1995 but never painted. Despite being in a bit of a state, these are really nice sculpts and we decided that they deserved to be painted properly.

Here are the two that I've finished so far...
...and this is the whole gang as they looked when they came down from the loft.
I am planning to have the gang finished over the next few weeks and will do a full post when it's done. In the meantime here a few more pictures of the finished ones: