


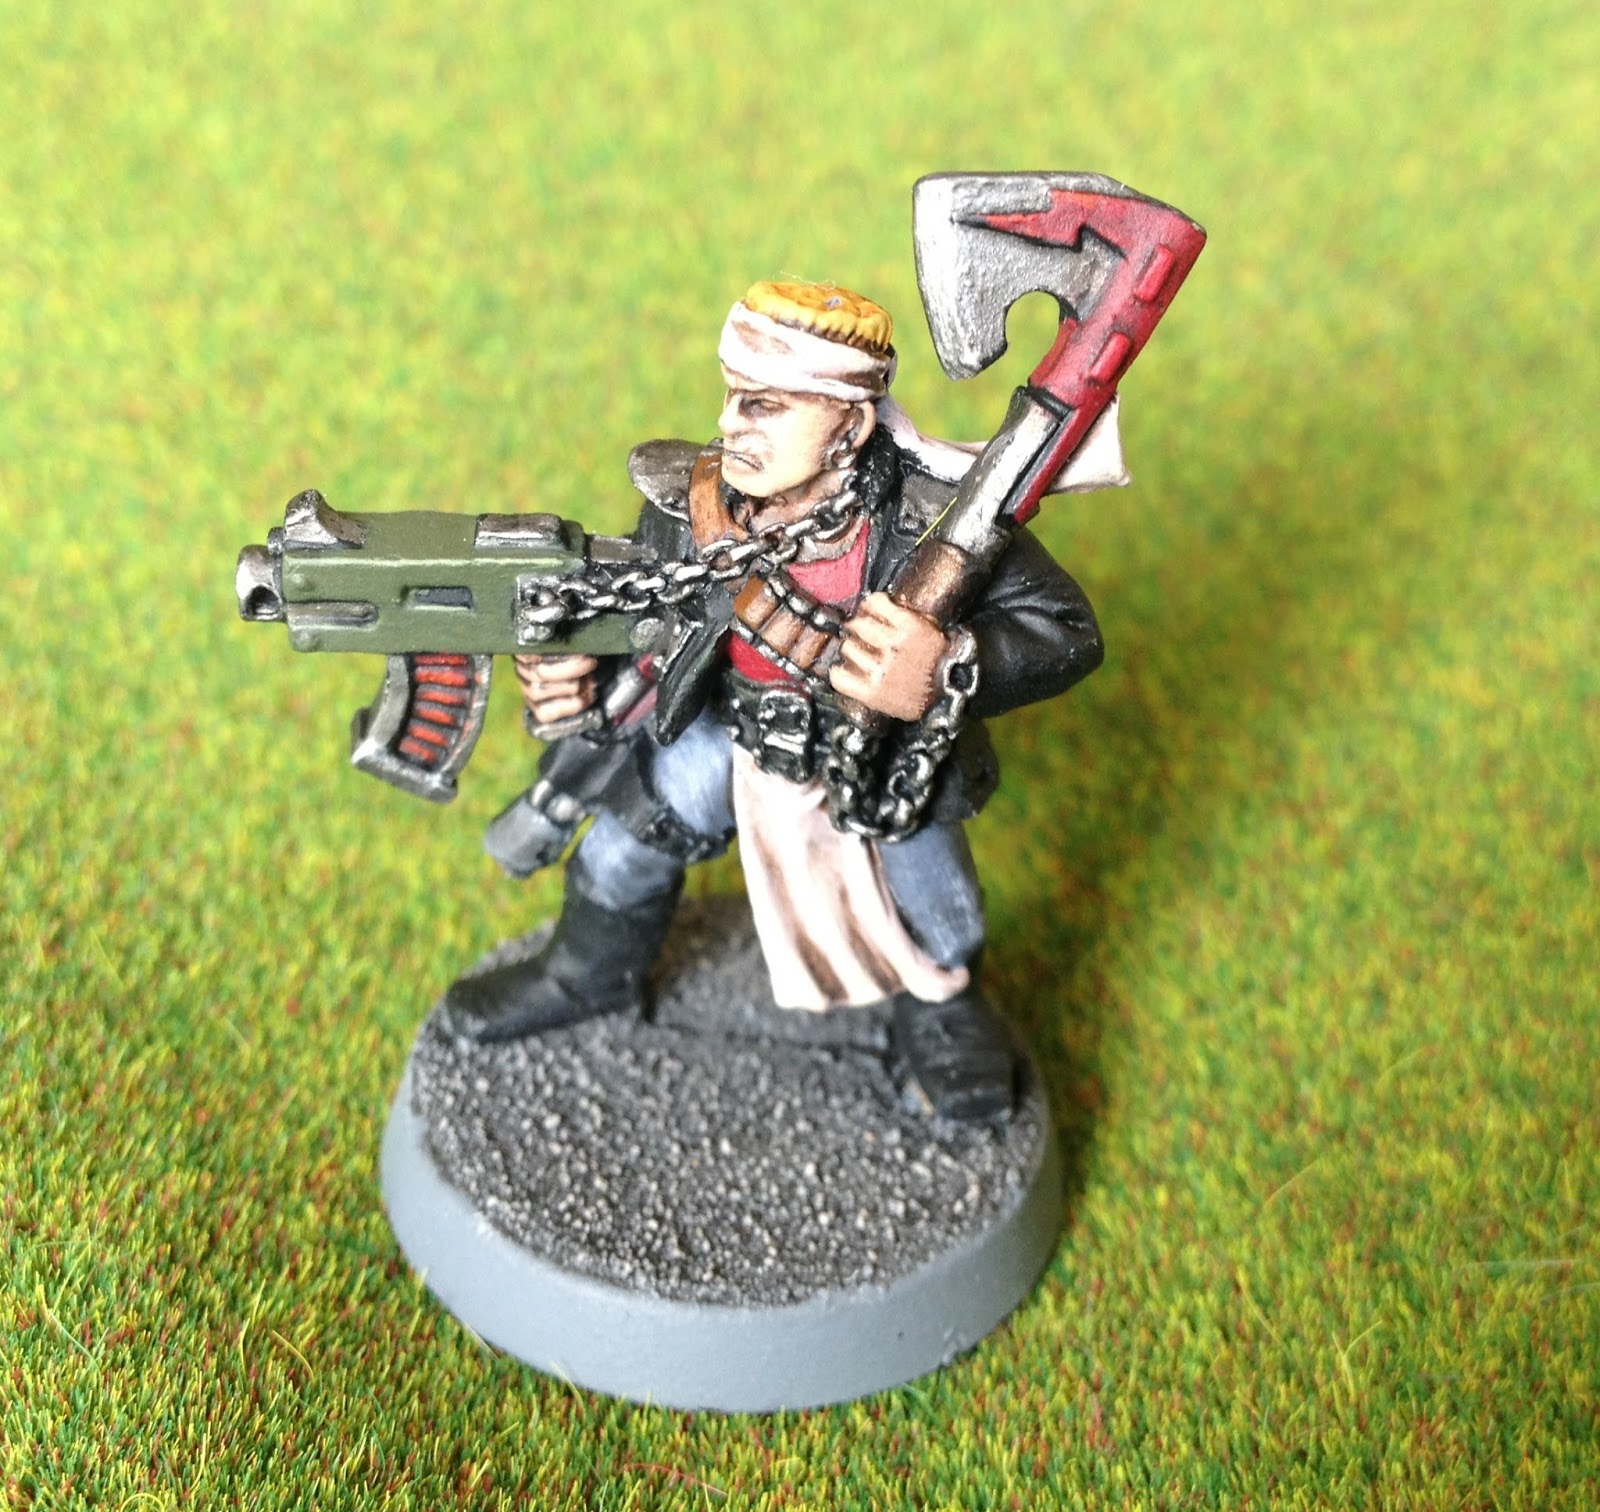
First, the base colours go on over a black undercoat. I use a mix of Vallejo, old range GW paints, and new range GW paints. Where I've used anything else, I've listed the alternative in GW's current range.

- Denim - Vallejo Sombre Grey / GW The Fang
- Weapons and other metal parts - GW Boltgun Metal / GW Leadbelcher
- Cloth and headbands etc - Vallejo Heavy Warmgrey / GW Rakarth Flesh
- Skin - GW Tallarn Flesh / GW Cadian Fleshtone
- Boots - Vallejo Black / GW Abaddon Black
- T-Shirt - GW Khorne Red
- Lasgun Casing - GW Castellan Green
- Hair - GW Iyanden Darksun / GW Averland Sunset
- Pick Handle - GW Rhinox Hide
- Leather - GW Mournfang Brown
- Base - Vallejo Neutral Grey / GW Mechanicus Standard Grey
I tend to vary the t-shirt and hair colours with different models in the gang, but I've used "default" colours for this example. Sometimes I give them green or purple hair because I think they look like they fancy themselves a bit as punk rockers...
Next a couple of washes are applied. At this stage, the model is looking a bit dark and messy, but this is just a step on the way to the final look and isn't anything to worry about. It would be looking a bit less dingy If I had chosen to use a flesh wash instead of a brown wash for the skin, but I wanted there to be a bigger differential between the recesses in the muscles etc. and the highlights. This could easily be substituted if you prefer the flesh wash.


Next a couple of washes are applied. At this stage, the model is looking a bit dark and messy, but this is just a step on the way to the final look and isn't anything to worry about. It would be looking a bit less dingy If I had chosen to use a flesh wash instead of a brown wash for the skin, but I wanted there to be a bigger differential between the recesses in the muscles etc. and the highlights. This could easily be substituted if you prefer the flesh wash.

- Flesh, cloth, t-shirt - GW Devlan Mud / GW Agrax Earthshade
- Denim and metal - GW Badab Black / GW Nuln Oil
- Hair - GW Gryphonne Sepia / GW Seraphim Sepia
Now it is time for the first set of highlights, using the original base colours to brighten up the model up again, leaving the muddy wash colours only in the deepest recesses of the model. I won't re-list the paints because they are same as in step one above, but there is one exception. A drybrush with a lighter blue is used on the jeans to finish off the denim effect. Make sure the brush is really dry, the paint should be as chalky and dusty as possible to get this looking right.

- Denim - Drybrush GW Space Wolf Grey / GW Fenrisian Grey
At this stage, I also started off the basing, using PVA to apply some sand.
The final stage on the mini itself is a second round of highlights, this time using some lighter colours. The sand on the base also gets a nice thick coat of grey.


The final stage on the mini itself is a second round of highlights, this time using some lighter colours. The sand on the base also gets a nice thick coat of grey.

- Flesh - GW Kislev Flesh
- T-Shirt - Vallejo Scarlet / GW Evil Sunz Scarlet
- Cloth and Skull Pendant - GW Bleached Bone / GW Ushabti Bone, up to pure white in some places
- Hair - GW Sunburst Yellow / Flash Gitz Yellow
- Lasgun Casing - GW Ogryn Camo
- Metal Parts - GW Runefang Steel
- Pick Handle - GW Rhinox Hide 1:1 with bone
- Leather - GW Mournfang Brown 1:1 with bone
To finish off the base, it gets a heavy black wash, followed by a drybrush with an off-white colour to bring out the texture of the sand. This minis is now ready to venture into the underhive!

I am really not sure how many people are looking for a tutorial about Orlocks, but here it is anyway... Next up is my scheme for painting the new style Orlocks that came out in 2001 as close to the official GW scheme of the time as possible. Don't all shout at once!
The old colour scheme looks good, glad you didn't do the weird goblin green bases though
ReplyDeleteThanks. I must admit that it was the "client" that wanted the grey bases... If it had been up to me I would have gone for goblin green just to be faithful to the original scheme.
ReplyDelete